Many companies and organisation uses G-Suite (now workspaces) from Google for the many apps and features the package provides to the organizations. The gmail webmail, Google drive and Documents, Meet, Calendar and other many services. However, apps suck as Slack are used for chatting within the organizations.
Rocket.Chat is a great alternative for slack (and other similar apps) that is free, open-source and can be self-hosted and was designed with Cyber Security in mind. This makes it ideal for use within organizations and companies. The only competitor in that category is maybe Mattermost.
While setting up Rocket.chat for my company Simula, an IT services startup, the IT department raised several concerns about enforcing security policy for accounts on the Rocket.chat instance, and about the overhead and the increased attack surface that they have to deal with. At that moment I remembered hearing about using G-Suite for web-browser Single Sign-On (SSO) using SAML.
From the Wikipedia page, Security Assertion Markup language (SAML) is an open standard for exchanging authentication and authorization data between parties, in particular, between identity provider (G-Suite in our case) and service provider (Rocker.Chat). Web-browser Signle Sign-On (SSO) is an important use case that SAML addresses, and it is one of the nice features that using G-Suite provides.
Using G-Suite accounts to login to other apps and services reduce the workload on the IT security team as they need to worry about enforcing account policy of G-Suite and nothing else, at the same time it reduces the attack surface. It also simplifies the login process on all members of the organization. With SAML employee have to worry about one account only across all services at the organization.
The decision was made quickly and I started looking up for resources on setting up SAML for G-Suite and Rocket.chat. At the time of writing this post, I could not find any. It took several hours of searching, reading, and testing until I manage to get it working. It was not easy and the documentation did not provide much help. All good reasons behind the motivation for writing this how-to guide.
So let’s start.
To use G-Suite as an identity provider for the service provider Rocket.Chat we need to register the Rocket.Chat instance as a new service provider in the G-Suite Admin Console. Then we need to configure the Rocket.Chat instance to use G-Suite as the identity provider. Easy… So… let’s start:
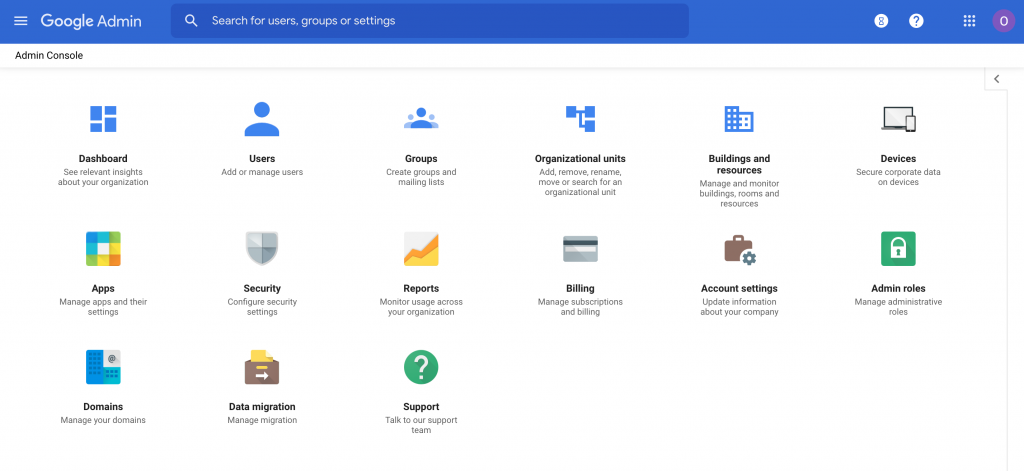
- First navigate to https://admin.google.com then click on Apps.
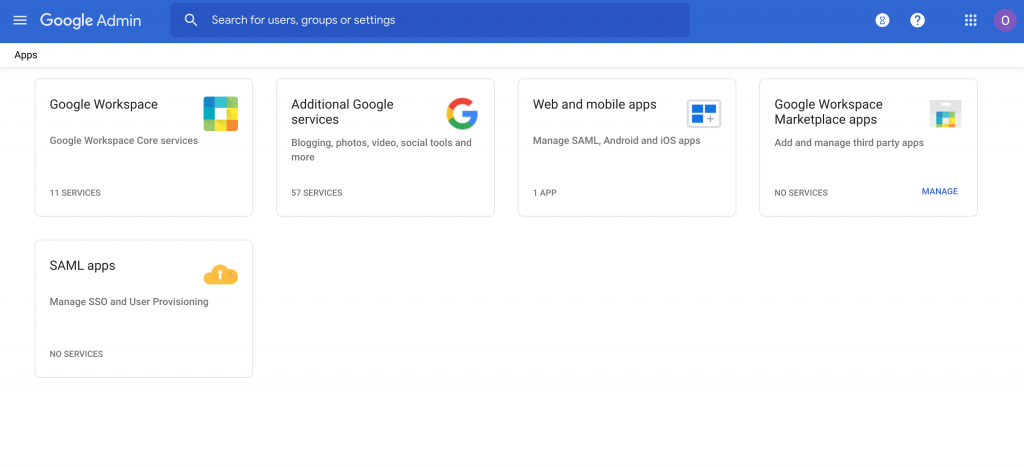
- Click on SAML apps then click on “Add App” then chose “Add custom SAML app”
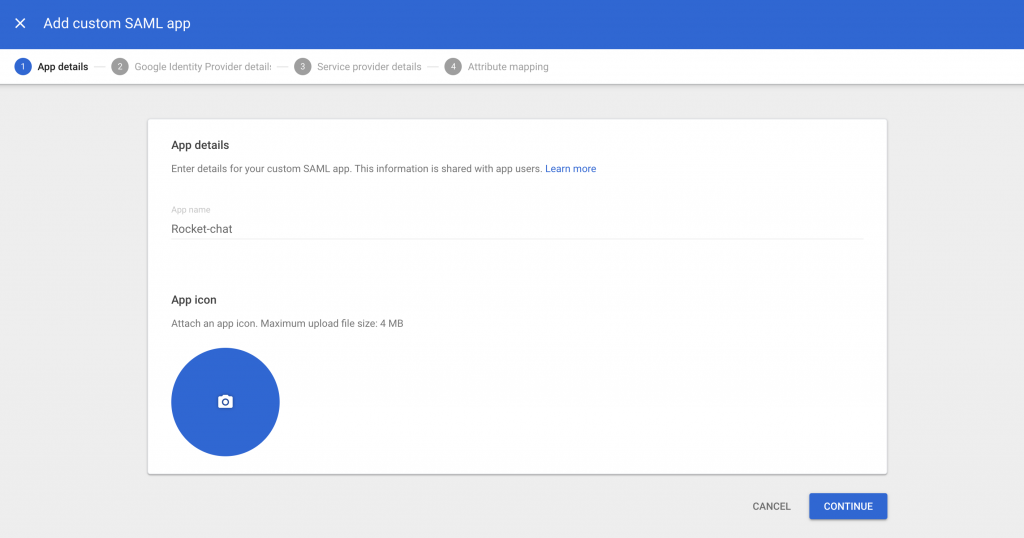
- The “Add custom SAML app” wizard starts. Chose a name for the custom App. This is for your reference and will be helpful in case you had many custom SAML apps.
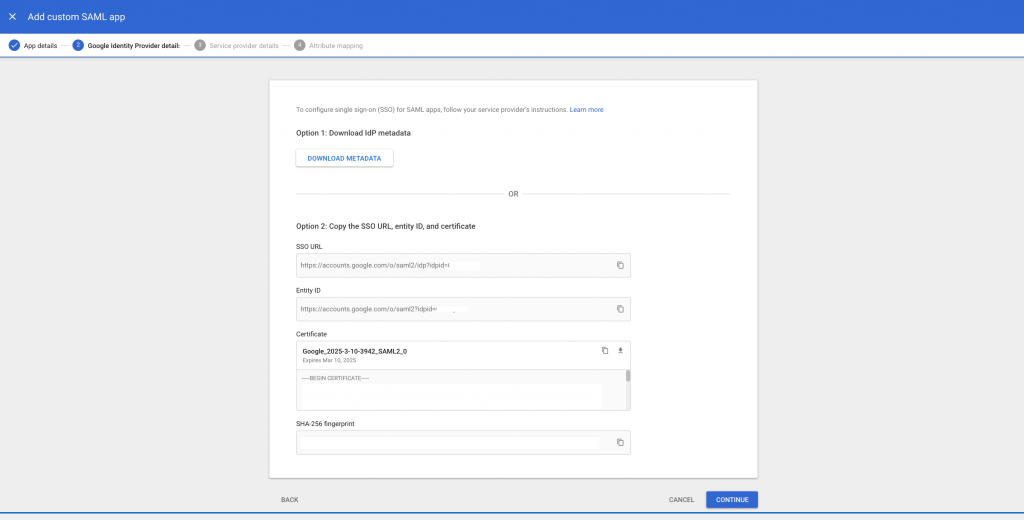
- Now step 2 of the Wizard provides you with the information necessary for setting up Rocket.chat to use G-suite as the identity provider. So login as an admin to Rocket.chat and open the SAML configuration page of the administration settings here: https://your_rocketchat_domain_here/admin/SAML.
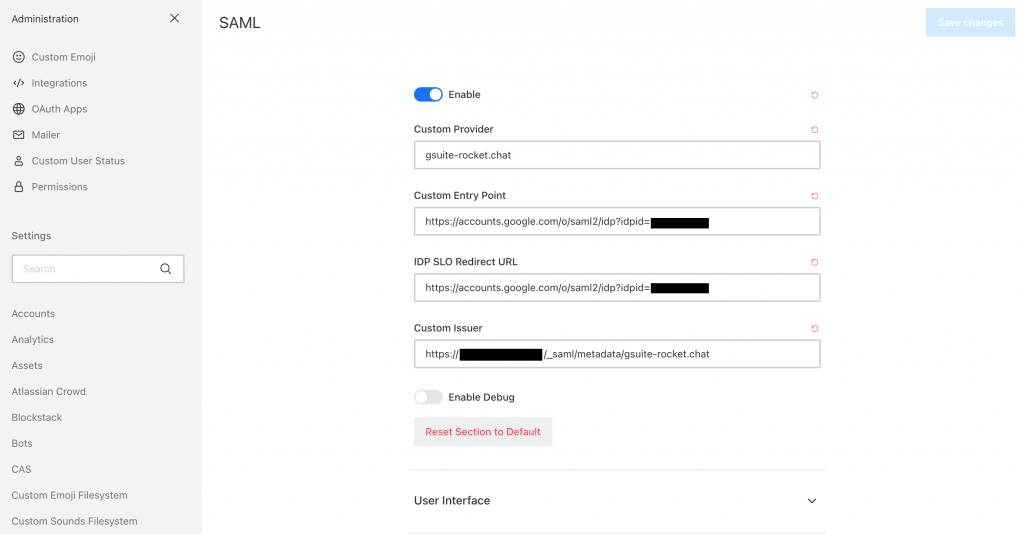
- In Rocket.Chat:
- Enable SAML:
- in “Custom Provider” type a name such as “gsuite-rocket.chat” this name will be used as the last part of the “Custom Issuer” field.
- Both “Custom Entry Point” and “IDP SLO Redirect URL” should have the “SSO URL” from the G-Suite Wizard.
- Custom issuer will be the url of your rocket chat followed by /_saml/metadata/ followed by the value you chose for “Custom Provider”, for example: https://your_rocketchat_domain_here/_saml/metadata/gsuite-rocket.chat
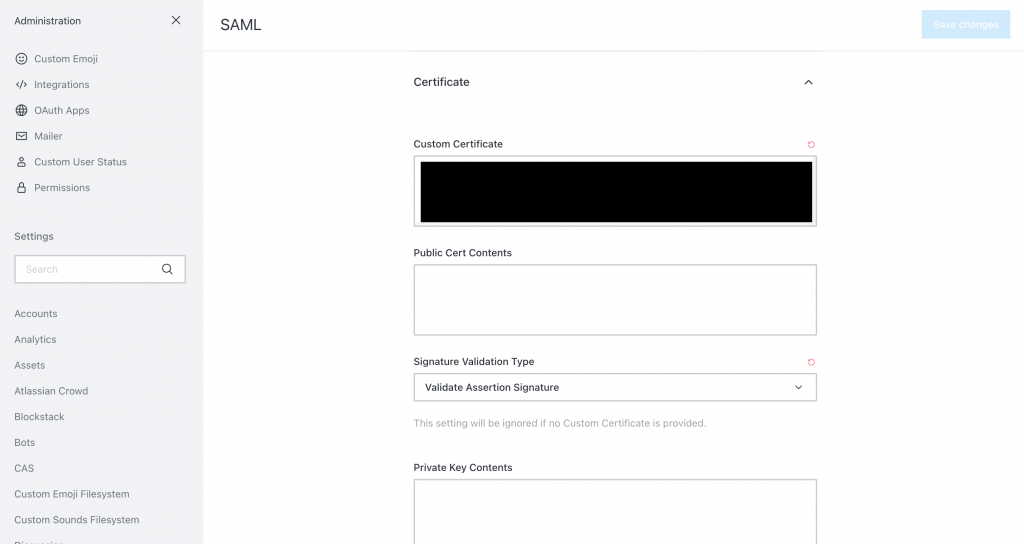
- In the “Custom Certificate” in Rocket.chat SAML settings, paste the certificate from the G-Suite Wizard. Make sure to delete the —- BEGIN CERTIFICATE—- —- END CERTIFICATE—-
- Change “Signature Validation Type” to “Validate Assertion Signature”, this can be changed later if you need to validate all all signatures.
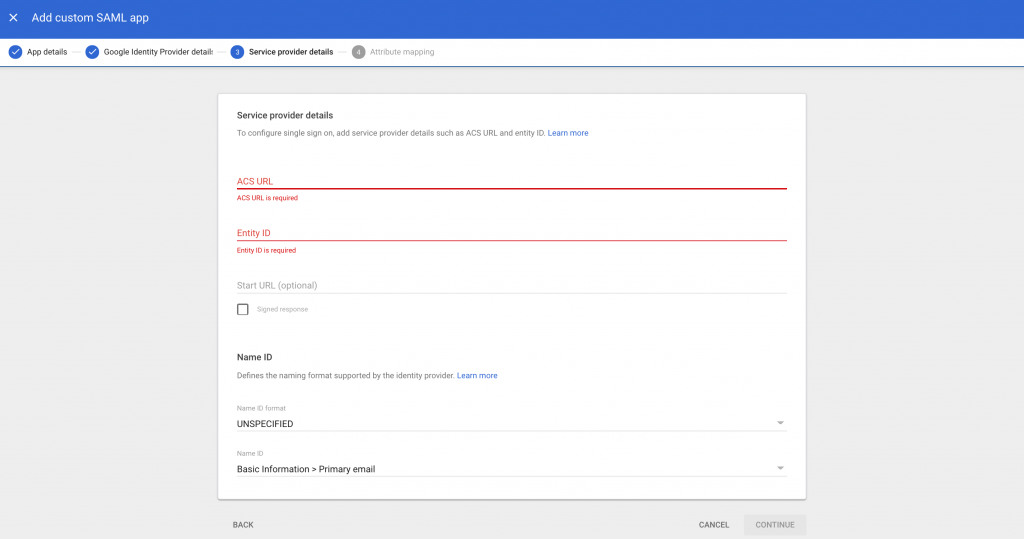
- Step 3 of the Wizard asks for “ACS URL” and the “Entity ID”. Here we take values from Rocket.Chat:
- “ACS URL”: https://your_rocketchat_domain_here/_saml/validate/gsuite-rocket.chat
- “Entity ID”: https://your_rocketchat_domain_here/_saml/metadata/gsuite-rocket.chat
- “Start URL”: https://your_rocketchat_domain_here
- Now we have to map the identity values from GSuite to the identity values on Rocket.Chat. Let’s keep the default value on Rocket.Chat: {“username”:”username”, “email”:”email”, “name”: “cn”}. On the last page of the GSuite wizard map “Primary Email” to “email” and to “username”, “First Name” to “cn”.
- Now all is set for testing. Click on “TEST SAML LOGIN” to test the configuration.
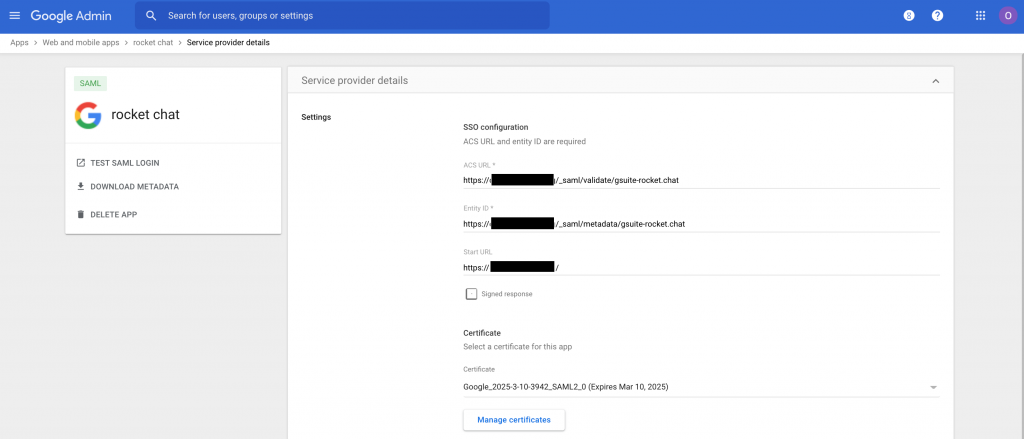
That is all it took for me to get SAML working for Rocket Chat using GSuite as an identity provider. However that was not straight forward and it took several rounds of debugging, checking the logs, checking the source code, restarting the server. So my advice is to enable SAML debugging on Rocket.chat. The error messages proved to be very helpful.
After the setup is successful, take some time to go through the Rocket.Chat settings especially the Account Settings to make sure the settings are compatible with using SAML.
References:
[1] https://en.wikipedia.org/wiki/Security_Assertion_Markup_Language
[2] https://support.google.com/a/table/9217027?p=saml_apps&hl=en&visit_id=637511817815526725-577973316&rd=1
[3] https://support.google.com/a/answer/6087519?hl=en&ref_topic=7559288
[4] https://duo.com/blog/the-beer-drinkers-guide-to-saml
[5] https://auth0.com/docs/protocols/saml-protocol/troubleshoot-saml-configurations
[6] https://docs.rocket.chat/guides/administrator-guides/authentication/saml/oracle-cloud
[7] https://rodriq.github.io/GSoC-2019-Interactive-APIs-Docs/administrator-guides/authentication/saml/

